

Evolve Hacks:
Applying Your Hacks

In a previous article, I released a set of files that allow you to hack your Evolve Authoring exports with some predefined changes that I included. In this article, I’ll show you how to apply those as well as add in other optional styling changes that I’ll share with you in upcoming articles (Or any styling changes you invent yourself).
When applying our hacks in Evolve, we need to approach it in two different ways. The first, is how we see for ourselves what the course will look like while we build the course, and the second, is how we include those customisations in the final files we send to our client.
At the end of the article, I’ll also share a video demonstrating my usual workflow to ensure both of these stay in sync.

Test your styling hacks while in Evolve
While working on your project in Evolve, hitting the preview button will open a new tab with your course running. To test out the customisations we want to make, we can do so directly in this tab.
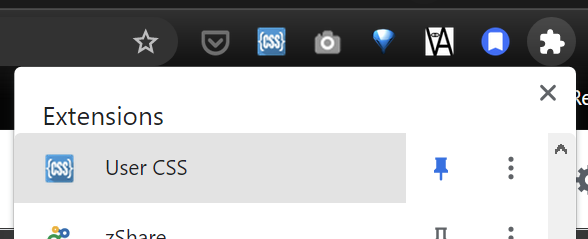
1. Install the User CSS Plugin
First, we need to install a browser plugin that allows us to add custom CSS to any page we’re viewing. I use User CSS in Chrome. Install User CSS and then restart Chrome (If you work with another browser like Firefox let me know what plugin you use).
Note: I’ve found if you don’t restart upon install it usually doesn’t work. I’ve also found that it doesn’t work on local files.
2. Preview your course and paste in the hack
Opening the Evolve course you want to try the hack on, click preview to launch it in a new tab. Then click the User CSS icon in your extensions.
You can then write any CSS you like into the User CSS pane and you will see it applied to your course. You can also apply any of the custom hacks I’ve provided in these articles below (I’ll expand this list as I release them).
Here’s a video demonstrating this process…
Note: It’s important to be aware that while User CSS can distinguish between different websites and remember the CSS you’re testing on each, it can’t distinguish between two different course previews in Evolve, so if anything ever looks weird in a course preview, make sure there’s no unexpected CSS in the User CSS pane.

Applying your styling hacks on export
While the above process allows us to see what our styling changes will look like, they’re only being applied in temporarily in your browser, not in the Evolve files that everyone else will see. To apply them to the final files, you need to apply the template below and follow the steps to apply your customisations.
Applying the template
As per my previous article, which also talked about why these changes are often necessary, you can download the template below. This also includes the default customisations described in my article Hacking Evolve Authoring.
This video demonstrates the process of applying the template, adding and removing customisations, testing, and preparing the files for your LMS.
A good workflow
This video demonstrates a good process to take when working with your projects like this…

That’s it!
In this article we covered applying the customisation template described in Hacking Evolve Authoring. We also covered how to play with the default hacks it applies, as well as test and apply additional optional styling hacks.
Over the next few weeks from this article, I will expand the list of custom styling hacks above to give you a range of ready made options.
I’d love to know if any of these articles helped you.
Share what you’re building or ask me a question on Threads or somewhere else.
Instagram is a great place to see my final creative coding experiments, while the others are are great place to connect or see progress updates.
If my content has helped you, I’d never say no to donations to help me keep writing.

Here are some other things you might like
- Extracting the extension from a filename string
- Register a new file type in Obsidian
- Transparent React Native iFrames/WebViews

Leave a Reply