

Hacking Evolve Authoring

As a programmer, I found that working in eLearning meant constantly battling software. ELearning software provides specialist functionality that other similar software rarely does, which is why it exists, but it’s also often incredibly restrictive and unintuitive in many other ways.
The below article describes how I hacked Evolve Authoring’s project exports to handle the most common issues I need to solve. It also provides links and instructions to download these hacks and apply them to your own projects. Future articles will also cover more specialised fixes based on this setup.
You can scroll straight to the bottom if you just want the downloads.
Back when I was working as an eLearning Developer at Pure Learning, we often used Evolve Authoring to develop eLearning courses for clients. Evolve was useful for a few reasons…
The rest of the team could use it easily.
While not a WYSIWYG editor, it is drag and drop and more accessible than code.
It supports common requirements of eLearning courses.
Question components, scoring, output to SCORM, etc.
Clients could could edit the courses themselves.
This was often one of the client’s requirements, and it is possible, however, as far as I’m aware, not a single client ever did this across all of our courses — regardless of what they were developed in.

The problem
As a programmer, though, I found building or customising many things in Evolve heavily restrictive or tedious. While this experience can be common with other drag & drop software and visual editors in general, Evolve is a closed system. This means that when you find yourself up against a limitation or restriction, unless the developers have specifically built in an option to cater for the deviation you need, there’s nothing you can do about it.
This is different to something like WordPress, which, on top of being incredibly visual and easy to use, is also very open. If you hit a limitation, there’s usually a 3rd party extension or theme online somewhere that will help you get around it. Or in a worst case scenario, you can enlist a programmer to create a custom feature or even dive into the code yourself.
Evolve has extensions too, but the name is misleading in Evolve. In Evolve, extensions aren’t 3rd party addons you can install, they’re simply core inbuilt options that the developers have chosen to name extensions — this means there’s no community building extensions, nor can anyone build one themselves.
Tools like Squarespace or Wix solve this in the opposite way. While these are closed systems like Evolve, they’re designed to be so customisable that hitting a limitation is less likely, and if you do, you can still add on custom CSS when you absolutely need to — something that Evolve doesn’t yet let you do.

What dominated my experience instead, was that on every job I did there would be something we needed to do that Evolve simply couldn’t do, plenty of things that clients would asked us to do that Evolve couldn’t do, and even more things that I wanted to do, that yet again, simply weren’t going to happen.
We’d constantly have to tell clients that even though we were the specialist developers they hired to get it done, we simply couldn’t do it because of software limitations. We’d often find ourselves telling clients that things most other websites already do, simply couldn’t be done.
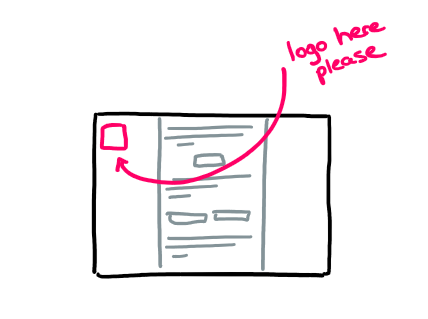
The client needs their logo to be in this particular position on the page to meet their style guide.

The client needs to meet a certain level of accessibility requirements (and should).

The user needs to experience this item a particular way or they simply won’t absorb the point of the lesson
The user needs to notice a visual change on this item at this point in time or what they’re asked to do simply isn’t clear.
Hacking together a solution
After digging through the mess that is Evolve’s settings and style options, I eventually decided that the easiest way to solve some of our common issues was to add custom CSS to the projects.
CSS is programming language for the web that is one of the simplest ways to take what is on screen and make styling adjustments to it. Unfortunately, Evolve doesn’t support adding CSS or any other code to the courses. So this meant deciding whether it was worth the risk to do so and figuring out how to minimize that risk.
I also found that some issues we were facing couldn’t be solved by CSS alone, they needed JavaScript. Thankfully, the solution that seemed most robust for including CSS also made hacking in JavaScript just as feasible and no greater a risk.
Why doesn’t Evolve support this?
When using CSS or JavaScript to manipulate elements on the page, you access those elements by referring to their class or id names. You also make assumptions about each elements current functionality and setup before modifying it to suit your needs.
This means that if someone writes custom code to manipulate elements in their course, an update to Evolve could, at any time, break that custom code and thus break the course.
ie. If Evolve changes the classname of a component you’ve customised, then the CSS or JS you wrote to manipulate it will no longer work.
This isn’t the only approach for software architects to take when building software like Evolve, though, many services out there allow users to add in CSS (and sometimes even JS), regardless of the risk — The mindset being that if you choose to add this kind of code, you are aware of the risk and prepared to monitor for any issues that may arise. It’s the architects recognising their software has its limitations, and putting in a loophole just in case anyone ever really needs it.
Another approach would be to specifically support the customisation of components while providing a safer way to do so. For instance, Evolve could allow users to add custom CSS to each component separately. That CSS would then get attached to each component by Evolve itself without the need for hardcoding class names or ids that could get out of sync.
Unfortunately, Evolve doesn’t support any of this, but since we needed to solve these issues regardless, I was left with no choice but to hack.
The solution at a glance
As an overview, the solution I came up with was to export the course from Evolve and then add in some custom CSS and JS files that would automatically make the adjustments we needed.
This complicates the export process slightly, and you’re probably starting to get an idea of its risks, but over the 3 years working at Pure Learning, and through many Evolve updates, we only had an issue once— Also bare in mind that to address the needed customisations, this was literally our only option.
That being said, when developing this approach, I needed to consider the risks, so let’s look at them.
The risks
- Our customisations could break when Evolve updates.
As mentioned above, software updates can unexpectedly break the custom changes I made. - Evolve updates whenever it wants.
Evolve is an online service and the we have no control over when it’s updated. This is scary, because it means that an update could occur at any time and potentially break our custom code.
(This could even occur midway through a job, and in a worst case scenario, could even change the standard component behaviour, customised or not—Which makes it scary regardless) - I might not be around when it breaks.
We all change jobs eventually, so designing a solution that only I could manage would be a risk to the team. Additionally, it could break when a client is trying to update the course themselves. - It makes editing a course more complex for the client.
Exporting a course from Evolve ordinarily results in a zip downloaded that is ready to use. This process would require unzipping it, adding some files, and then zipping it up again. This isn’t a big deal for the team, but adds frustrating complexity for the client.
(I could also mention testing here, but you should always test your courses after exporting regardless)
Minimizing the risks
The risks listed are unavoidable, but so to is the need for a custom solution in the first place, so here are the main considerations I had while building the common hacks I used in Evolve.
- Design for modularity.
When adding CSS or JS that would change a particular aspect, I always programmed it to be separate from everything else. This would mean that if one customisation broke, it wouldn’t affect others, and it also meant if one customisation needed to be turned off, it could be done so easily without affecting any others. - Comments
I commented the code very clearly and verbosely. So even if a non-programmer had to look at it, they could do so. - Differentiating mandatory and optional customisations.
Some hacks needed to be applied to every course we created, but some were course specific or simply optional. I made sure to clearly differentiate while still making any hack easy to turn on or off. - Documentation that doubles for testing.
I built a course in Evolve that documented all the customisations with examples. That meant there was one place to go to see all the customisations side by side as well as a course that could be exported just like any other to test all the customisations anytime Evolve updated. - Clear processes around applying and testing.
I organised the files that would contain the customisations to make applying them super clear. I even created a guide for clients. - Design for graceful failure.
Where possible, I always built courses to work in an adequate way without customisations. The customisations were then applied to modify that behaviour to exactly what we needed. This meant that if a customisation failed, and the person exporting the course didn’t notice when exporting, it would still be useable and potentially not noticable.
It’s worth noting that designing for graceful failure isn’t always the best approach. Graceful failure helps errors go unnoticed, but often what you want is the exact opposite, to make sure errors are very noticeable so that you don’t accidentally publish something without realising it has an error.
I jumped between these two, but opted for graceful failure in more instances. I chose it because I expected most people wouldn’t test comprehensively after each export — which means even if an error was super noticeable, it may still slip through the cracks, so it would be better if they weren’t noticeable.
The solution
The two links below provide the files that I used to customise our courses as well as the documentation that describes how to use and apply each hack.
As of 22/08/2021, I have tested this documentation to confirm it still works as well, and also made a few improvements.
If you are looking at this page at a much later date, follow the instructions in the downloads to test that a particular customisation still works (as Evolve may have made updates that negatively affect the hacks).
Here is a list of every customisation in my initial customisations release. The bold ones are applied by default, while the others are included for you to optionally turn on. In future articles, I’ll explain why I made all these changes and link to them here.
- Tabbable Headings
- Tabbable MCQ & GMCQ Lead In Text
- Tabbable Media Grid Items
- MCQ Aria Label Fallback Text
- Shift Focus to Top of New Pages
- Accessible Audio Component improvements
- Use the Code Component for Screen Reader Only Text
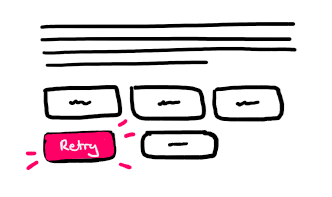
- Alter the Colour of Retry Buttons
- Use Image Buttons to Indicate Component Completion
- Dynamic Back Button
- End of Page Notification for Screen Readers
Installation
1. Download the files
Download both zip files below. One is an Evolve project that acts as the documentation (Run the index.html to view it, and you can even import this into Evolve), and the other one contains just a few files that you will apply to customise other projects (these won’t run on their own).
2. Export your project
Export your project that you want to apply the customisations to from Evolve. Then unzip it. If you don’t have a project yet, or you just want to check them out, you can use the documentation files themselves as a test project directly.
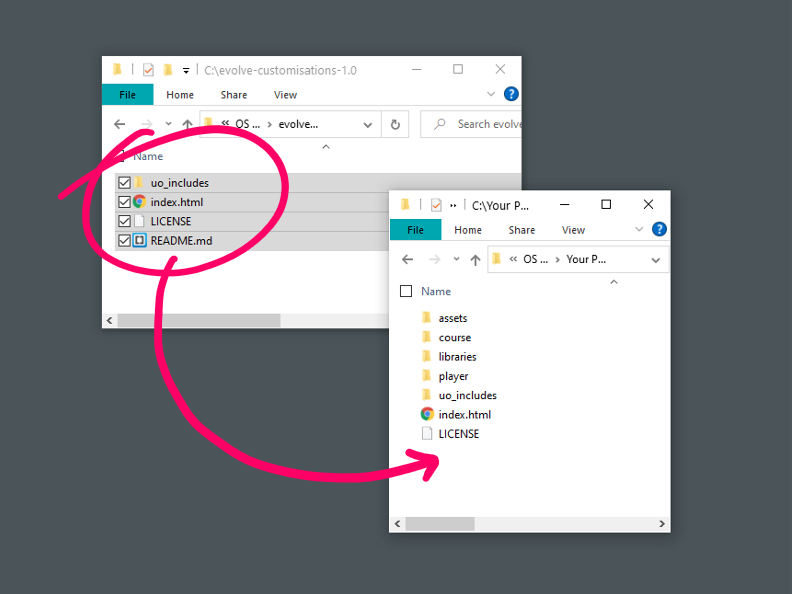
3. Apply the default customisations
Then drag the customisation files onto your projects files (You’ll need to overwrite the index.html). This will then apply all the default customisations to your project.
4. Test the project
You should test it to see that the customisations have worked, however, note that a SCORM project can’t be simply run on your computer, so you will either need to test them in the SCORM cloud or an LMS, or, more conveniently export the web version from Evolve for testing first—This version can’t be used in an LMS, but it’s a quick way to download and test locally.
There are ways to run SCORM projects locally, but I’ll cover it in another article
5. Apply optional customisations
The customisation files only have the default hacks turned on (The ones that will be useful for every project). To turn on or use the additional optional hacks, refer to the documentation and edit the files in the uo_includes folder (use Dreamweaver, Brackets, or VSCode).

That’s it!
If you work with Evolve Authoring, hopefully these files come in handy. Please get in touch with me if they’ve helped you. Also feel free to get in touch if you’re having trouble applying the files or have any other questions.
In upcoming articles, I’ll also be going through several other styling hacks I commonly used and how to test for accessibility. Follow along or check back if you’d like to hear about them.
I’d love to know if any of these articles helped you.
Share what you’re building or ask me a question on Threads or somewhere else.
Instagram is a great place to see my final creative coding experiments, while the others are are great place to connect or see progress updates.
If my content has helped you, I’d never say no to donations to help me keep writing.

Here are some other things you might like
- Extracting the extension from a filename string
- Register a new file type in Obsidian
- Transparent React Native iFrames/WebViews

Leave a Reply