

Using Lottie Animations through iFrames

If you don’t work directly with code, implementing Lottie animations may feel more complicated than your usual tools — but they can often be used easily, through the creation of a basic HTML file.
In the article below, I describe the process to implement a Lottie animation inside a basic HTML page. This will allow you to use Lottie in a number of different authoring tools that accept iframes or web objects — or will act as a starting point to help you begin using Lottie in your HTML.
If you’re not sure what a Lottie animation is, check out my article here.
1. Choosing a Lottie animation
You can create an animation in After Effects yourself using the LottieFiles or BodyMovin’ plugins or you can choose an animation from the free animations or marketplace on LottieFiles.com (or the other stock sites described here).
Changing the animation later:
If creating your own animation, or if you haven’t finalised your choice of animation yet, that’s fine. You can perform the next steps with any Lottie Files animation and easily swap it later while keeping the setup.

2. Choose how your Lottie will play
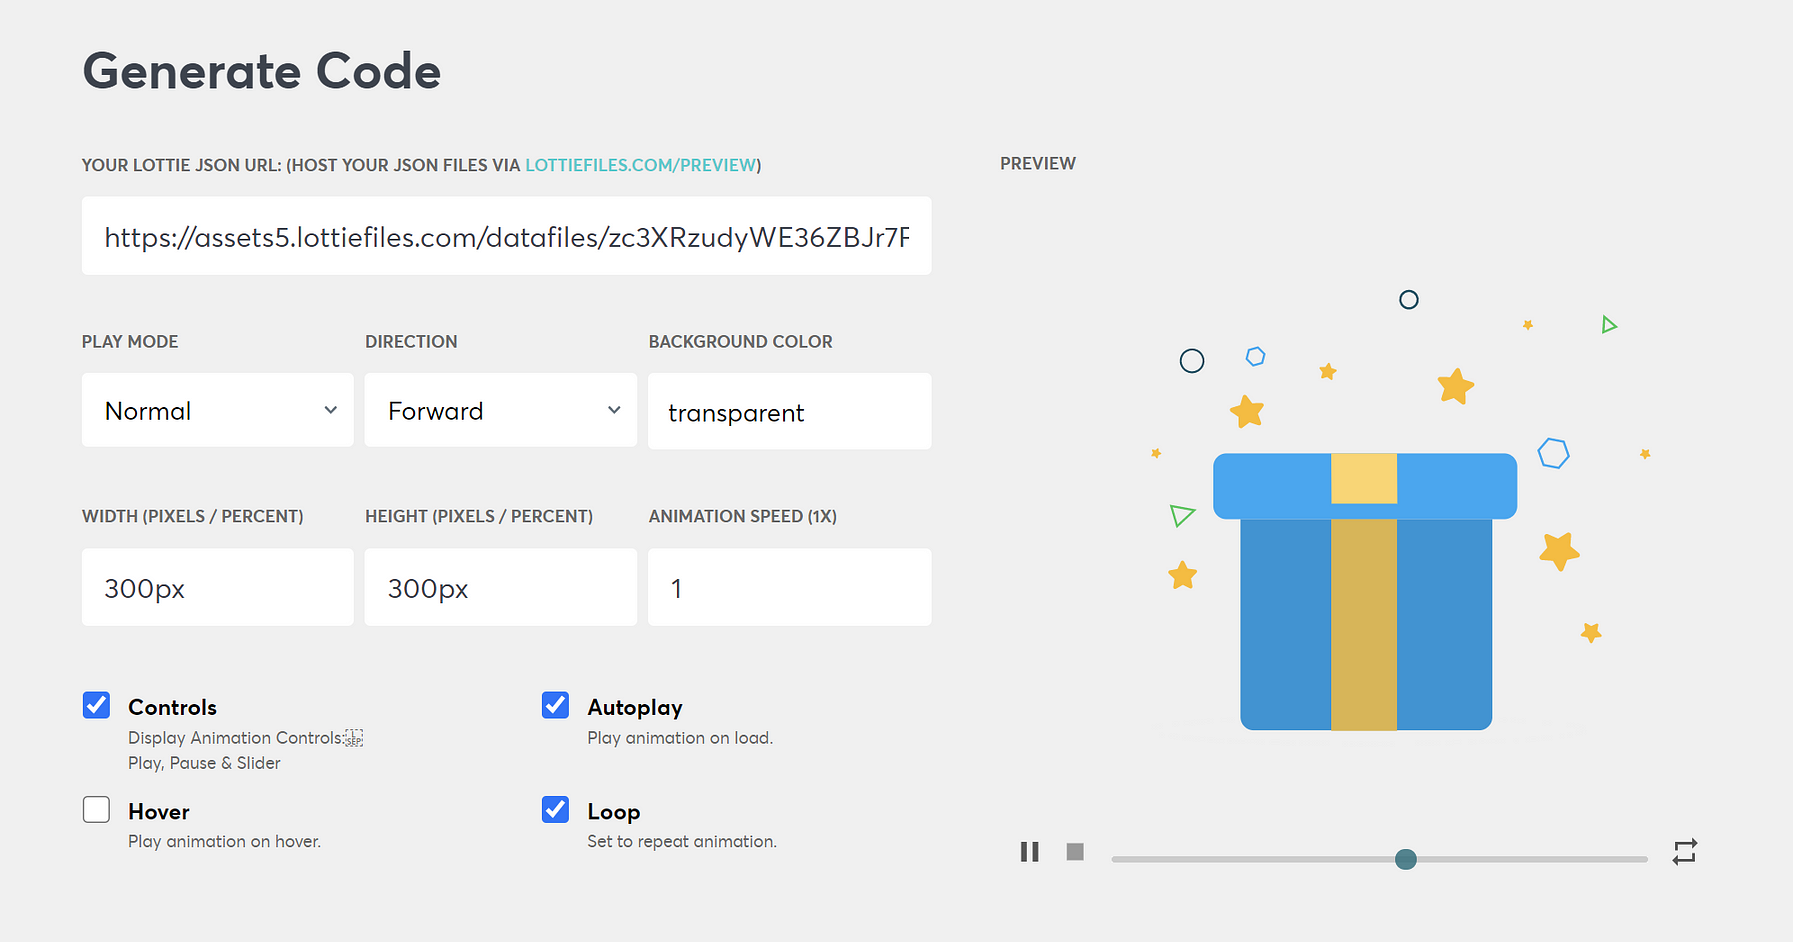
The Lottie Web Player is a great way to design how your chosen animation will play without having to do any coding yourself.
Go to the Lottie Web Player and choose from basic dropdowns, checkboxes, and typing in simple values, to decide if the animation should loop, if controls should appear, direction, speed and even some interactivity.
Common settings:
You’ll almost always change the width and height to 100%.
This helps your animation appear as large as possible within the component that you use it.

3. Setting up the HTML file
Once you’re happy with the settings, you need to get them into a file you can use.
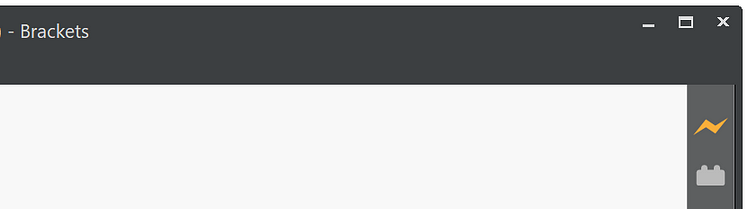
Start a new text file in a code editor like Brackets(or even plain old Notepad on Windows) and name it index.html
Don’t use MS Word or even Wordpad as these can modify the file into a more complex format.
Copy one of the HTML snippets below into your blank document and save it. Use the one that suits your requirements.
Decorative only animation: Use the below snippet if your animation is purely decorative and should be ignored by screen readers.
<!DOCTYPE html>
<html lang="en">
<head>
<style>
* {
margin: 0;
padding: 0;
overflow: hidden;
}
.container {
position: absolute;
height: 100%;
width: 100%;
}
</style>
</head>
<body>
<div class="container">
<!-- DELETE THESE TWO LINES -->
<!-- AND PASTE YOUR LOTTIE SCRIPT HERE -->
</div>
</body>
</html>
Screen reader visible animation: Use the below snippet if your animation provides important information to the user that should be read to them by a screen reader.
<!DOCTYPE html>
<html lang="en">
<head>
<style>
* {
margin: 0;
padding: 0;
overflow: hidden;
}
.container {
position: absolute;
height: 100%;
width: 100%;
}
</style>
</head>
<body>
<div class="container" aria-label="PUT YOUR DESCRIPTION FOR SCREEN READERS HERE">
<!-- DELETE THESE TWO LINES -->
<!-- AND PASTE YOUR LOTTIE SCRIPT HERE -->
</div>
</body>
</html>
Back in the Lottie Files web player (Where you adjusted the playback settings), copy the code underneath the player by clicking the Copy Code button.
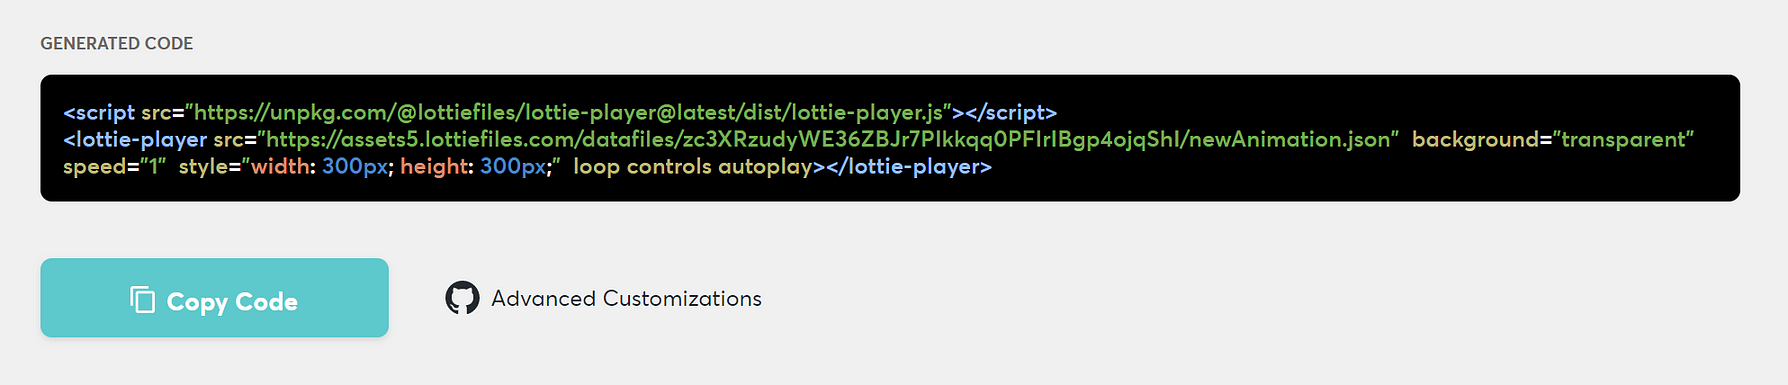
In your HTML file, delete the two lines shown below and paste in the code snippet you copied from the web player.
<!-- DELETE THESE TWO LINES -->
<!-- AND PASTE YOUR LOTTIE SCRIPT HERE -->If you used the version for screen readers,also change the text shown below to a description of the lottie-animation or what it’s representing.
PUT YOUR DESCRIPTION FOR SCREEN READERS HERE4. Replacing the animation (opt)
If you’ve created your own animation, you’ll need to include it and update the HTML code snippet to reflect this.
After exporting as a JSON file from After Effects, place the JSON file into the same folder that you’ve saved the html file.
Name the file with no spaces. Something simple and all lowercase like data.json is best.
In your HTML file, edit the src attribute of the lottie-player tag to reflect the name of your JSON file and that it is in the same folder.
Before editing it will look similar to this:
<lottie-player src="https://assets2.lottiefiles.com/datafiles/lMHl0obBNN9kCUE/data.json"After editing it should look similar to this:
<lottie-player src="data.json"5. Using the animation
The index file (and animation file if you included your own), are now ready to be used in an authoring tool and included as an iframe or web object. This process will differ depending on your authoring tool.
To test the animation immediately, note that double clicking the index file will load a browser window but will likely not display the animation. This is due to JavaScript security restrictions while running off your local machine.
To preview the file, you can open it in Brackets and then click the lightning bolt on the right.
This Live Preview simulates the file as if it is running on a website’s hosting space.

That’s it!
In the above we looked at preparing an HTML file as a way to view your Lottie animations and use them in any solution that accepts an iframe or web object. If you do this regularly, you should bookmark this page as a reference for the HTML snippets.
For a guide on creating a Lottie animation in After Effects or embedding the iframe in another program, follow along for future articles.
I’d love to know if any of these articles helped you.
Share what you’re building or ask me a question on Threads or somewhere else.
Instagram is a great place to see my final creative coding experiments, while the others are are great place to connect or see progress updates.
If my content has helped you, I’d never say no to donations to help me keep writing.

Here are some other things you might like
- Extracting the extension from a filename string
- Register a new file type in Obsidian
- Transparent React Native iFrames/WebViews

Leave a Reply